Showing posts with label Meatless. Show all posts

Tuesday, March 31, 2020

Easy Naan and Jerusalem Artichoke Hummus

Greetings and Salutations! What a wild year March has been! I took a break from the normal days of hand washing and staring out the window at squirrels to celebrate my birthday.

35, when did THAT happen!?

MMMMM my traditional Angel Food Cake! This year I had blueberry sauce drizzled over the top.


As we are deep into shelter in place, curfews, and general lockdown status, I was afraid my birthday would be a bust. My fantastic parents who live within an hours drive of me offered to have me spend the night and celebrate as a family. I went from my house to their house and we stayed put. We played Rummikub, cooked, investigated a woodpecker nest in the yard, and simply enjoyed spending time together. As simple as it was, it was incredibly special. I am blessed to have the family I do.

So! Now, another year wiser I am continuing my kitchen adventures. My mom gets a misfits market produce box regularly and this time she got the MADNESS box. That's 22 lbs of fresh fruits and veg y'all. She split it with me and so I have ingredients I've never even looked at twice. (I was NOT sad she offered to share her bounty with me! Thanks, Mom!)

First test? Jerusalem Artichokes. I had no idea what they were or how they tasted. I had heard of them along my kitchen adventures, but that was the extent of it. Fun fact- Jerusalem Artichokes and Sunchokes are one in the same! Whatever you call them, they are yummy.

Jerusalem Artichoke AKA Sunchokes are a root vegetable

After I did some research, I found they are a quite versatile little root vegetable. I decided to make a hummus with them. After roasting, the skins peel off very easily and they smell just like artichokes. Word to the wise- they do cause some, uh, flatulence, so maybe don't serve this at a fancy pants dinner... But the flavor is well worth it! The longer it sits, the more artichoke flavor comes out.


Mmmmm creamy, artichoke-y, lemony hummus
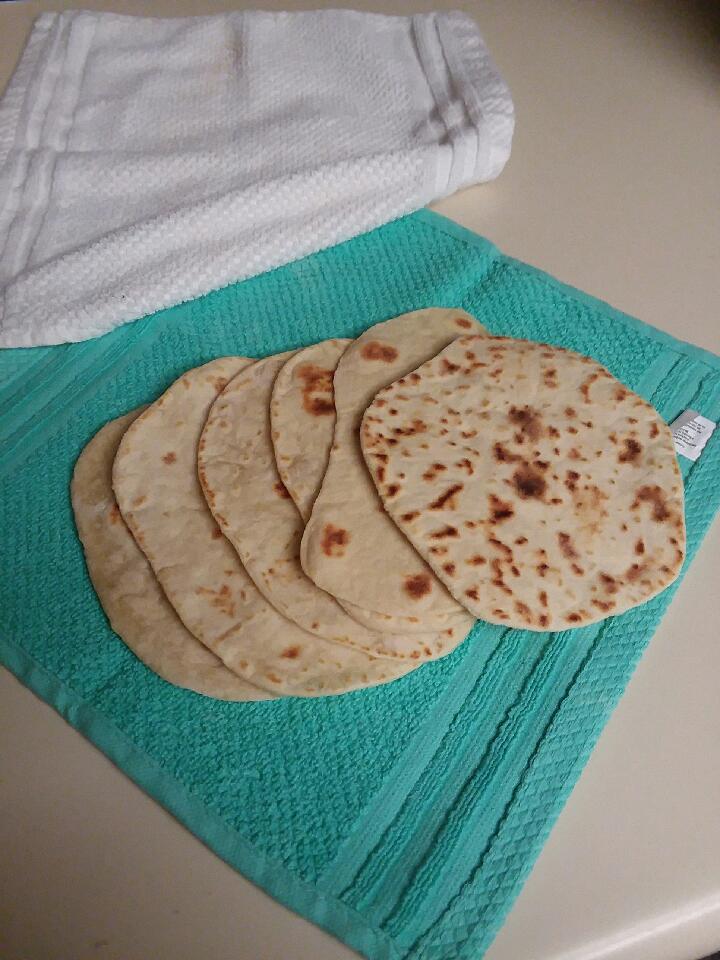
After I made the hummus I realized I need a vehicle to eat said hummus. I found a super easy recipe for yeast free Naan and made some alterations to fit my needs. I will never buy store bought Naan ever again! This is so easy and the flavor is so much better!

Warm, soft Naan!

I hope you are all staying healthy! Go have your own kitchen adventure. Its a perfect time to experiment.

Cheers!

Jerusalem Artichoke Hummus

3-4 medium Jerusalem Artichokes
1 (15oz) can of garbanzo beans, rinsed
1/4 cup good quality olive oil
1/4 cup lemon juice
2 cloves garlic
1 TBS parsley
salt, pepper, paprika, and lemon pepper to taste.

Preheat oven to 375 F.

Wash artichokes well. Wrap in a parchment paper pouch, and place in a baking dish, seam sides down. (you can use foil for this if you choose) Roast in the oven for 45 minutes until very soft. Let cool.

Once the artichokes are cool enough to handle, remove the skins.

Place the flesh in a blender with all remaining ingredients. Blend until smooth. You may need to add some water if too thick. Add 1-2 TBS at a time, pulse the mix to slowly incorporate.

Serve with fresh naan or pita chips.


Easy Naan Bread

Makes 6 small flat breads


1 ¼ cup all purpose flour
½ teaspoon baking powder
1/2 scant teaspoon granulated sugar
½ teaspoon salt
3 tablespoons + 1 teaspoon milk
2 tablespoons butter
¼ cup plain sour cream


Mix flour, baking powder, sugar and salt in a medium large bowl.

In a microwave safe container, melt butter. Add milk and return to microwave. Heat until warmed through, do not allow to boil or get overly hot.

Add sour cream and stir into warm milk until smooth.

Make a well in the dry ingredients. Pour in sour cream mixture. Stir gently until the ingredients come together.

Using your hands, knead the dough in the bowl to form a soft ball. Transfer dough to a lightly floured surface. Knead until dough is smooth and no longer sticky. You may need to add flour as you go. Dough will be soft! DON'T OVER WORK!

Let the dough rest for ½ hour on a lightly-floured surface and put the empty bowl upside-down on top of it. The longer the dough rests, the softer it gets and the easier it will roll out.

Split dough into 6 equal parts, shape each into a ball and roll out.

Rotate the dough-disk while rolling, and flip it over occasionally. Sprinkle with flour every now and then, so it will not stick to your rolling pin or surface. You want your disks to be about 1/8 inch thick.

Preheat skillet or griddle to medium high heat. Do not add any oil or fats.

Gently transfer your naan to the cook top you are using. Cook until bubbles have formed on top and the bottom side gets lightly nicely browned. Then flip, and cook until done, about 1 minute.

When each nann bread is cooked, rest it between two clean kitchen towels or in a lefse cozy, keeping them warm while baking the rest. As you add each completed naan, flip and rotate the resting breads to allow steam to keep working its way through the breads. This keeps the breads nice and soft!

Once cool, store in an airtight container at room temperature.

Thursday, March 26, 2020

She blinded me with Science (cake)

Welcome to another edition of Staying Sane by Cooking during a pandemic!

I decided to honor my roots by cooking a tried and true recipe called Depression Cake or as Mom and I call it- SCIENCE CAKE!!!!

Before I get into that, let me give you a brief insight into my life.

I am a science nerd. I love to find out how things work, why, what makes them tick?


These 3 shows right here were my jam! They appealed to my inquisitive nature and helped to develop a healthy hunger for learning.

My Grandpa Spranger always encouraged us to explore our world. He would often smuggle gifts into the trunk of the car when we were leaving for home after a visit. Sometimes he was caught and the "gift" was returned promptly. Other times he got away with it- a chemistry set, dissection kit, and a portable pond were just a few of the truly memorable ones. The fun part was we lived 6 hours away, you couldn't exactly just walk it back over. :)

I loved to scoop up tadpole eggs in the pond by our house and watch them grow, then we'd release the them once they got big enough to not be eaten by fishies.

Even in middle school, I fully enjoyed dissecting owl pellets and identifying what they had for supper. (Easiest A of my life!) Later, when my lab partner fainted over African Frog dissection, I gladly did the entire project. The smell of formaldehyde isn't for everyone...

Anyway, you get the picture, me and science are besties!

Food is no different. I like to know why and how things work the way they do. I came across this cake that has no eggs, no butter, and gets mixed in the pan it bakes in.

Ok, I don't see how this works... then I get to the leavening agent: baking soda and.....VINEGAR. What?! Oh, I'm in now. I've made the volcano that erupts with this combination. I gotta see how this works!

This cake is delicious as soon as it cools, but I found the crumb was better on day 2. It seemed to hold better as it sat. I did read that you can omit the cocoa powder and make a white cake, and now I wonder if I could replace the cocoa with jam and make a peanut butter and jelly cake!

I was pleasantly surprised at how beautifully this cake rose, and DIDN'T explode in my oven. You can't taste the vinegar, which was an admitted concern of mine. Just creamy, chocolate goodness. 

Here's to some tasty science and an inexpensive treat!

Science Cake! 
Aka Depression Cake
Makes an 8x8 pan

1 ½ cups all-purpose flour
1 cup white sugar
4 tablespoons unsweetened cocoa powder
1 teaspoon baking soda
½ teaspoon salt
1 teaspoon vanilla extract
1 tablespoon cider vinegar
6 tablespoons vegetable oil
1 cup water

Preheat oven to 350 degrees 

Sift flour, sugar, salt, soda, and cocoa together into an 8x8 inch ungreased cake pan. Make three depressions. Pour oil into one well, vinegar into second, and vanilla into third well. Pour water over all, and stir well with fork

Bake at 350 degrees F  for 35 to 40 minutes, or until tooth pick inserted comes out clean.Once cooled, frost with your favorite frosting.


Peanut Butter Frosting (It's one of my favs with chocolate cake!)
Makes enough for an 8x8 cake including the sides

1/2 cup butter, softened
1/2 cup creamy peanut butter
1 1/2 cups powder sugar
1/2 tsp vanilla
1/4 tsp salt
1-2 TBS almond milk or milk

Using a mixer, cream together the butter and peanut butter. 

Slowly add the powdered sugar. It will be thick!

Once the butters and sugar are well mixed, add vanilla, salt, and 1 TBS milk and mix with the mixer until light and fluffy. If needed, add another TBS of milk to get the desired consistency.  


Wednesday, February 26, 2020

Lauren's Favorite Tofu

Let me introduce you to the great Lauren! I met her almost 10 years ago and we just clicked. She is the kind of woman everyone should have in their lives. She is sweet, strong, compassionate, and little quirky. In my book, she's good people.

Lauren is the kind of friend who calls and says- Beep Beep! I'm in your driveway. Get in, Fool. We're going adventuring. You had a nightmare and you just can't sleep? No worries, she will answer the phone. Lost your cat at 3am? Call Lauren, she's already on her way to work and she's got your back (Breathe woman! Your cats know how to survive outside, they are cats!)

With a friend like that, it's easy to return those same favors. When you get a call and your buddy is sad- you automatically ask, do you want to come here or you want me to come to yours? When she just wants to keep your company, you scoot over on the couch and ask if she wants to stay for supper. You trust her with your worries and know they won't leave the room. She's just the best friend anyone could have.
Lauren and me on the beach for an adventure!

One of Lauren's favorite meals I make is stir fried tofu. It's a fairly simple dish that I don't actually have a recipe for. I do it all by eye. But, as it is her favorite, I promised her I would at least write it down.

I love this dish because it is so versatile.The veggies can be changed up depending on the season. The sauce can be made as spicy or mild as you like. Serve it over rice or cauliflower rice. The options are limitless. I have made this as simple as just the tofu and mushrooms. It's a beautiful flavor. The secret's in the sauce...

You won't see any exact amounts, only approximations on this one. It will give you a general idea of how to prepare the dish. Don't worry, there's really no wrong way to make this!

Lauren's Favorite Tofu
Serves 2-4

1 Block of firm or extra firm tofu
1 Box (8oz) fresh mushrooms- portabella or white
Garlic- 2-3 cloves
1/4- 1/2 Small onion
1 Small zucchini, sliced and quartered
1 Small carrot, shredded
Broccoli florets

Sauce ingredients
Soy Sauce
Oyster Sauce
Pepper
Garlic chili sauce for heat
Nutritional Yeast
Sesame oil- optional and to be used VERY sparingly.


Hot rice to serve


To prepare the tofu, drain the water. Using a tea towel or similar lightweight towel gently squeeze extra liquid out of the block. Do not squeeze too hard or you will break the block.

Slice the tofu into planks and lay out on the tea towel. Cover completely and press down to remove any additional liquid hiding inside.

Cut planks into cubes approximately 1x1.

In a large saute pan, swirl the pan with a light coat of olive oil.  Let heat over medium heat. Add tofu.

Allow tofu to cook, turning to brown all sides. I like to cook mine until it is fairly firm and a dark golden brown. This takes about 20 minutes on my stove top.

Add mushrooms and veggies. Saute until soft.

When veggies are done, sprinkle all with nutritional yeast. Stir well.

Time for sauce! Start with the soy sauce, I generally use about a 1/3 cup or so. Add in the oyster sauce approximately 3 TBS. Add fresh cracked pepper. Add in the garlic chili sauce- if you like it spicy, go heavy, if not use about a tsp. (Lauren likes hers red with spice, so I leave the chili sauce on the counter for her to add extra to hers) If desired, add in 1-2 DROPS (A little goes a LONG way) of the sesame oil. Stir well until all veggies and tofu are covered and the sauce has thickened slightly.

Sprinkle additional nutritional yeast over the mix.

Serve over hot rice.


Friday, April 27, 2012

Mr. Hart's Tacoritos

I would like to introduce you all to Mr. Hart. If you read me regularly you have seen me make mention of this fabulous human being. 


West Coast and East Coast collide after nearly 10 years apart
Mr. Hart lives in California. We are both MN born and raised. Even though we live on opposite ends of the country, we are best buds. The internet is a wonderful tool for keeping in touch kids!

We were blessed with the opportunity to catch up in person over his spring break. We spent 4 1/2 days playing in the sun, visiting the sea turtle clinic, doing a bathroom make-over, getting tattoos, and laughing late into the night. 


Ohhh that is some mighty fresh ink! They are healed up and look nice and sharp now :)
A cute little sign in the bathroom
Love these little bathing beauties!
Mr. Hart and I at the sea turtle clinic
My hubby on the left and my best friend on the right- at the beach. A perfect day!
A sweet moment captured between my husband and me.
High tide and crazy windy

Checking out the Tabby Ruins in St. Marys
Beach day!
Jon taking a stroll
My dad took us on a great tour of St. Marys and Kingsland
We had a fantastic visit. Though it was brief, it was much needed. God blessed us both with exactly what we needed- a good long laugh with old friends.

One day Mr. Hart decided he wanted to cook for us. His mom had a recipe called tacoritos that he loves. So we took a field trip to the grocery store and gathered up the ingredients. 

This recipe is so simple yet filling and delicious! 

Here's to you and your culinary adventures, friends. Cheers!

Mr. Hart's Tacoritos
Makes 1 9x13 pan

flour or corn tortillas
1 # lean ground beef (OR vegetarian ground meat substitute or vegetarian chorizo crumbled)
1 jar herdez salsa (or your favorite salsa)
1 envelope cheesy taco seasoning
3 cups Sargento Mexican blend cheese
Sour cream to serve

Brown beef. Drain if needed. Add taco seasoning and prepare meat according to seasoning directions. 

Preheat oven to 375.

To assemble:

Spray a 9x13 pan with cooking spray. Place a layer of tortillas on the bottom. Add taco seasoned meat. Sprinkle 2 cups of cheese over the meat. Top with salsa. Add another layer of tortillas over the top of the salsa. Sprinkle with remaining cheese.

Bake, uncovered for 13 minutes.

Brown under broiler to achieve desired golden color.

Let sit for 10 minutes.

Cut and serve with sour cream.

Sunday, January 15, 2012

Artichoke and Spinach Lasagna

When I was growing up, my mom would occasionally make non-traditional lasagna for a treat. She had a few in her recipe box, and they were all delicious. One my favorites was an amazing meatless lasagna. The leftovers are divine.

My wonderful parents were able to find me some gluten free lasagna noodles last week. I was so excited to be able to have mom's lasagna again. We made a double batch last night- it was just as good as the original. My mom and dad, who still eat gluten, couldn't tell the difference in the pasta. Hurray!

The pasta they found was from Tinkyada. I was very pleased with the results. The noodles weren't mushy or mealy. The texture was that of a traditional lasagna noodle. If you can find Tinkyada products- give them a try.

Here's to you and your culinary adventures friends. Cheers!

Artichoke & Spinach Lasagna
Serves 4


  ½ cup onion                                        
  14 oz spaghetti sauce             
  1/2 to 1 can artichokes, drained and chopped (I like to use one
   can)
  2 cloves garlic
  ½ tsp dry rosemary
  4 lasagna noodles (traditional or gluten free depending on your
  needs)
  2-3 oz feta
  1 cup chicken stock*         
  1 ½ cups mozzarella                          
  5 oz thawed frozen spinach


Preheat oven to 350.

 Press spinach dry. I do this in a clean tea towel or cheesecloth, but you can just squeeze the water out with your hands.

 Spray a skillet with cooking spray. Sauté onion and garlic for 3 min. Stir in broth and rosemary. Bring to a boil. Add chopped artichokes and spinach. Reduce heat. Simmer 5 minutes. Add spaghetti sauce.

In a large pot of salted water, simmer noodles about 10 minutes. (I prefer to put bring the water to a boil, add the noodles. Put a lid on the pot and turn off the heat. Let the pasta hang out in the water for 10-12 minutes. I find my noodles don't break as easily this way.)
 
Spray a 10x6 pan with cooking spray.

Spread 1/3 of the artichoke mix in prepared pan. Top with 2 noodles. Sprinkle ½ cup mozzarella over noodles. Repeat. Top with feta and remaining 1/2 cup of mozzarella.

 Bake covered 25 minutes. Uncovered 10. Let stand 10 minutes before serving.

* You can sub with vegetarian chicken flavor broth or vegetable broth if you choose.

Saturday, January 7, 2012

Brussels Sprout Gratin

Welcome to the first post of 2012!

So glad you could join us for a new year of adventures.

Jon and I were looking back on 2011 a few days ago while sitting on the beach together. It was a very crisp day as old man winter finally showed up in GA. But, it worked out well for us. We went to a popular stretch of beach that we normally don't frequent. It's a beautiful little spot on the coast- soft white sand, salty sea breeze, and a great view of not only the coastline, but the edge of the city as well. We like it because we can watch the sun set from the beach. The problem is that many of the locals and most of the tourists like it for the same reason. So, on nice days it can become a bit crowded for my taste.

But, since there was a nip in the air, the beach was very sparse. And that's just the way I like it. Mostly, we had the beach to ourselves save the masses of fluffed up sea gulls and the occasional bundled up runner. We sat in our little chairs and soaked in the sunshine.

We talked about how many challenges we've overcome in the past year and half- we moved across country, got new jobs, changed our dietary lifestyle, and have grown closer to God through out the entire process. It was a great time of reflection, laughter, prayer, and meditation. And, Jon played a bit of Angry Birds on his phone. I informed him there were actual angry birds on the beach to look at, but he was less than interested in those...At any rate, we are very thankful for the blessings that we were given in 2011 and have no doubt that our Father will be faithful once again this year.

In fun new food news- We can resume the cooking light project! Well, with a twist. But it's back nonetheless. My parents gifted me with a copy of The Cooking Light Gluten Free Cookbook. Yippee! I am very excited to have some new ideas and recipes. And I always enjoy the cooking light books.

Also in food fun- Jon bought me a juicer for Christmas. I've been having fun making fruity juices for my breakfast and veggie juices for snacks. Which helps with our "Year of healthier us!" plan.

First off, let me say- I don't do resolutions. I personally think they set you up for failure. And no one wants to feel like a looser. So, periodically through out the year I make mini goals. Last year, going gluten free was a big thing. For the longest time, I was struggling with what I could eat and not feel sick. Now that I have that under control, I wanted to move to the next level. Healthier gluten free, on a budget.

So, after discussing this with my husband he purchased the juicer as a fun surprise. It's a great way to get a lot of good, healthy nutrients in a tasty drink. After I had been making my own juice for a few days I found myself less likely to grab a handful of m&m's and more apt to grab an apple or pear. (I must admit, I was startled the first time I realized I chose fruit over chocolate, by choice...) Upon this realization, I decided it was time to add the next goal- incorporate more veggies and less meat into our diet.

I say less meat because A. Jon LOVES meat and B. I enjoy a good, thick, medium rare steak or some salty ham on occasion.

I have eased our suppers into this by making more veggie side dishes that I know Jon does enjoy (cucumber & tomato salad tossed with a little Italian dressing for example) or by reducing the amount of meat in a recipe. We had a "clean out the fridge" veggie soup a few days ago- it was completely meatless. (We love this sort of soup and it's so easy- a can of veggie broth, a can of diced tomatoes, a few seasonings, and whatever raw veggies you've got in the fridge. Simmer together until the veggies are tender.)We both enjoyed it so much that we just about had to rock-paper-scissors for who got to take the last cup for lunch.

I am very impressed with the way that Jon has embraced the increase in veggies. He's even making better snacking choices- light popcorn, almonds, string cheese.

So, here we are. A new year of culinary adventures. Lots of exciting new side dishes and main dishes coming our way. I must say, I am looking forward to the tasting of it all!

I will be sharing an easy side dish today. We had it as an accompaniment to some grilled chicken and fresh sliced tomatoes. It made for a great looking plate and a great combo of different flavor profiles.

Here's to you and your culinary adventures, friends. Cheers!

Brussels Sprout Gratin

24 oz Brussels sprouts
1 ½ TBS butter
1 ½ TBS gluten free flour
1 cup milk, warmed
salt and pepper to taste
3 oz Gruyere, Jarlsberg, or Gouda cheese, grated

Preheat oven to 400 degrees F.

Using a sharp knife or a mandolin, thinly slice the sprouts. Simmer in a pot of lightly salted water until just tender. Shock in an ice bath.

Make the sauce by melting the butter and flour together in a saucepan over medium heat. Cook, stirring, until smooth and bubbling, about 1 minute; slowly whisk in milk and continue to cook, whisking frequently, until thick and creamy. Season the sauce well with salt and heavily with pepper. 

Spread the sprouts in an even layer in a 2 quart baking dish. Pour the sauce over the sprouts and sprinkle the cheese evenly over the top. 

Bake in the center of the oven for 10 to 15 minutes until the top is golden and bubbling.

Wednesday, December 14, 2011

Cheesy Broccoli Soup

I have a well known love of soup. I am particularly fond of it when it's cold and rainy out.

The last week or so has been soup weather. We've had taco soup, tomato soup, and a brand new recipe- cheesy broccoli soup.

We served the cheesy broccoli soup with crusty gluten free ciabatta buns. The meal was wonderfully rustic- and simple. It was just what I needed during the busy Christmas season.

Here's to you and your culinary adventures, friends. Cheers!


Cheesy Broccoli Soup

Serves 6

1 cup chopped onion  
2 garlic cloves, minced 
3 cups chicken or veggie broth (I used turkey broth that I made and froze at Thanksgiving)
1 (16-ounce) package broccoli florets 
 2 1/2 cups 1% reduced-fat milk 
1/3 cup all-purpose gluten free flour 
1/4 tsp black pepper 
8 oz Velveeta, cubed
4 oz cheddar cheese, shredded 

Heat a large nonstick saucepan coated with cooking spray over medium-high heat. Add onion and garlic; saute 3 minutes or until tender. Add broth and broccoli. Bring broccoli mixture to a boil over medium-high heat. Reduce heat to medium; cook 10 minutes.

Combine milk and flour, stirring with a whisk until well blended. Add milk mixture to broccoli mixture. Cook 5 minutes or until slightly thick, stirring constantly. Stir in pepper. Remove from heat; add cheeses, stirring until cheese melts.

Place one-third of the soup in a blender or food processor, and process until smooth* Return pureed soup mixture to pan. Ladle into bowls and serve.

* I used my stick blender to puree the soup. I like mine to have some texture so I leave it fairly bumpy.

Friday, July 22, 2011

Flourless Peanutbutter Cookies

Who loves peanut butter cookies?! I do! Ok, let's be honest. I like most cookies. But I've always been a sucker for the basic peanut butter cookie with its little cross hatch design on the top and crystals of sugar shimmering around the golden edges. It's so unassuming and yet packs so much flavor.

I found a recipe for flourless peanut butter cookies and decided I had to try them.Of course I had to tweak the recipe, because I can't help myself...


They turned out so good! They taste just as good as traditional peanut butter cookies.

Here's to you and your culinary adventures, friends. Cheers!


Flourless Peanut Butter Cookies
Makes about 16 cookies

1/2 cup creamy peanut butter
1/3 cup packed brown sugar
1 egg white
1/2 tsp baking soda
1/4 tsp salt
1/2 tsp vanilla

white sugar for rolling

Cream together the sugar and peanut butter. Add remaining ingredients. Combine well.

Preheat oven to 350.

Take a piece of dough about the size of a walnut and form it into a ball. Roll the ball in the white sugar to coat. Place on a cookie sheet lined with foil. Using a fork, gently press the cookie to flatten slightly.

Bake 10 minutes until the edges are lightly golden and cookies are puffy.

Remove from oven, cool 2 minutes before transferring to a wire rack to cool completely.

Thursday, July 21, 2011

Wheat Free Update/ Lemon Buddies

So. It's been 21 days since I went wheat free to help alleviate my chronic kidney stones and kidney pain. Here's what I know-

1. I haven't felt this good in years. Probably since before my first surgery to remove some large stones that were stuck in my ureters about 6 years ago.Subsequent surgeries left a lot of scar tissue and inflammation in my ureters. (Inflammation that I aggravated, unknowingly, by ingesting wheat)

2. I don't miss gluten filled foods the way I thought I would. I have always been a pasta and bread sort of girl. So I was very sad that I would have to do without. BUT there are great companies like Heartland who make products like this:

GF pasta that actually tastes so good Jon-boy didn't even know the difference!
As for the bread, well I haven't tackled that one yet. The little blocks of "bread" I see in the supermarket scare me to death. I mean have you looked at it? It's a tiny brick. For all I know it was a brick that was spray painted to look like bread! Don't get me wrong, I am sure that there are some great products out there, but I don't want to pay $7 for that tiny little thing I don't even know if I will like. There are many gf bloggers (like Lynn) who have bread recipes that look like bread. Fluffy, white, homemade bread. I intend to give them a go and see what I can do.

In the meantime, though, I have developed a liking for white corn tortillas. They make a great sandwich wrap, both sweet (like jelly sammys) and savory (ham and cheese anyone?)

3. I have found that my body functions so much more efficiently when not trying to process wheat. Cutting out wheat meant also cutting almost all processed junk that I really liked (ramen noodles, Little Debbie snacks, and desserts) I've even managed to slim down a little bit as a result. I've lost enough "extra padding" that I was willing to cut my long hair off and donate it(What? No one wants to look like a fat toddler with a bad haircut. Sometimes when I have short hair that's how I feel! Don't judge me LOL). I love the way this cut turned out :)


4. As a cook with a fair amount of experience under my apron, I find new recipes and techniques less daunting. I was petrified when I first read my list of foods I was supposed to avoid. All I could see for a few days was "bad" food. It was difficult for me to see past that list and explore all the foods I could enjoy. Now, I embrace the challenges. I get to seek out new ingredients and culinary adventures.

5. You gotta shop around (the store). My frugal nature sometimes makes shopping a HUGE challenge. Gluten free foods that are marketed specifically as gf tend to be more expensive. That's the nature of the beast, you get to pay extra for companies to print on the package "a naturally gluten free product". But I've found that good, thorough label reading lets me find foods that are gf without the high price tag. I am blessed that I don't have to worry so much about cross contamination. I can eat foods that are processed in facilities that process wheat, dairy, and nuts. I shop the entire store reading labels as I go (just because a product doesn't say it's gf, doesn't mean it isn't. You just have to read the ingredients.) So even though it takes us longer to get through the store that it used to, it's worth it in the long run both financially and health-wise.

6. And finally, my sweet husband is very supportive. He tries not to bring a lot of the non-safe foods home that I like. He helps me find alternative foods for those I shouldn't eat anymore. And when I prepare a new dish he always gives it a go. (In the game of give and take I try to make things that are familiar to him. Example- We'll have grilled pork chops with a new side dish.)

So, friends, that's the wheat free update. I will leave you with a yummy little treat recipe for Lemon Buddies. My dad makes half the batch with lemon and half the batch with lime. Then, he mixes them together for lemon-lime buddies. Yum!

Here's to you and your culinary adventures, friends. Cheers!

Lemon Buddies
160 calories per 1/2 cup serving


9 cups Rice or Corn Chex cereal
1 ¼ cups white vanilla baking chips
¼ cup butter or margarine
4 tsp grated lemon peel
2 TBS fresh lemon juice
2 cups powdered sugar

Into large bowl, measure cereal; set aside.

In 1-quart microwavable bowl, microwave chips, butter, lemon peel and juice uncovered on High 1 minute; stir. Microwave about 30 seconds longer or until mixture can be stirred smooth. Pour mixture over cereal, stirring until evenly coated. Pour into 2-gallon resealable food-storage plastic bag.

Add powdered sugar. Seal bag; gently shake until well coated. Spread on waxed paper or foil to cool. Store in airtight container in the freezer. Best when served cold directly from the freezer.

Friday, July 15, 2011

Green Bean & Bacon Salad

Last night Jon and I had grilled stuffed burgers (beautifully seasoned ground beef filled with either Velveeta cheese or laughing cow cheese grilled to perfection) with this green bean salad. I was amazed that Jon gave the beans a 9 on our scale of 1-10. I shouldn't have been surprised though, that man loves both bacon and green beans.

The salad reminded us of the green beans we used to get at a local Chinese joint, only with the bonus of bacon :)  I garnished ours with a little bit of slivered almonds. They were delicious.

What sorts of non-starch sides do you prepare for your family?

Here's to you and your culinary adventures, friends. Cheers!


Green Bean & Bacon Salad
Serves 6
85 calories per 

2 pounds green beans, trimmed 
3 bacon slices*
2 tablespoons finely chopped shallots 
1/4 cup red wine vinegar 
1 tablespoon honey 
1 tablespoon Dijon mustard 
1/2 teaspoon freshly ground black pepper 


Cook beans in boiling, salted water 5 minutes. Drain and plunge beans into salted ice water; drain. Place beans in a large bowl.

Cook bacon in a large nonstick skillet over medium heat until crisp. Remove bacon from pan, reserving 1 teaspoon drippings in pan. Crumble bacon; set aside. Add shallots to drippings in pan; cook 1 1/2 minutes, stirring frequently. Add vinegar; cook 30 seconds, scraping pan to loosen browned bits. Drizzle mixture over beans.

Combine honey, mustard, pepper, and salt to taste, stirring with a whisk. Pour over green bean mixture; toss to coat. Sprinkle with crumbled bacon.

* I used 3 heaping TBS Oscar Meyer real bacon pieces. Crisp them up in the pan. Remove and drain on paper towel. Add a tsp or so of butter to the pan to cook your shallots.

Sunday, June 26, 2011

Momma's VBS Carmel Corn

My mom and dad just wrapped up another year of Vacation Bible School at their church. Dad did music and choreography with the kiddos while Mom and her crew fed the small army each day. One of the snack items they made was carmel corn. (Well, technically it was supposed to be like Cracker Jack, but some of the children had peanut allergies so they were omitted)

Mom gifted us with a sample of her carmel-y corn and I just had to have the recipe.

Today, I will share with you how to take 3 bags of microwave popcorn and turn them into a sweet, crunchy treat.

3 bags of popped microwave popcorn

1 thunderstorm + 1 good book + 1 bowl of carmel corn = a great night in

A word of caution: this recipe is 100% dangerous to anyone on a diet. Don't say I didn't warn you... ;)

VBS Carmel Corn
24 (1-1/4 cup) servings

30 cups popped popcorn (3 3oz microwave bags)
2 cups brown sugar
½ cup dark corn syrup
1 cup (2 sticks) margarine
½ tsp baking soda
1 tsp vanilla extract
Cooking spray

Preheat oven to 250 degrees.

Use cooking spray on anything the wet caramel will touch. (Makes for easier cleanup later.)
Pop each bag of popcorn. Place the popped corn into a roaster pan, removing unpopped kernals*.

In a large, deep saucepan combine brown sugar, corn syrup, and margarine. Bring to a boil over medium
heat, stirring to blend. When the mixture begins to boil, boil 5 minutes, stirring constantly. 

Remove from heat and stir in the baking soda and vanilla. The mixture will be light and foamy.
Immediately pour caramel over the popcorn and gently stir to coat.  Don’t worry too much about getting all the popcorn coated.

If baking in the roaster: Bake uncovered for 1 hour, carefully stirring every 15 minutes.

If baking on the two baking sheets: Divide the popcorn between the two baking sheets. Bake
for 45 minutes, carefully stirring every 15 minutes.

Line a table or counter with waxed paper. Dump the popcorn onto the wax paper and separate pieces as needed. Allow to cool completely, then store in airtight bags. (I just returned mine to the roaster, covered with a layer of foil and put the lid back on. The foil was to ensure it was airtight due to living in a humid climate)

* If you don't remove the kernels you run the risk of breaking a tooth. Take the time and remove them please.

Friday, June 3, 2011

Bo-ld peanuts

I say bo-ld because that's the way southerners say it. They drop the "i" in boiled.

When I visited southern GA years ago we stopped at a roadside stand and tasted boiled peanuts. I thought they were the nastiest thing I have ever had the displeasure of putting in my mouth. They were mushy and they were warm- it was like eating peanut flavored mashed potatoes. I vowed to never, ever try them again.

Fast forward to last week when my grandma was here.

In fact- here's a picture of my gram, my mom, and me :)

She wanted to have some boiled peanuts while she was here. So we stopped at a little roadside stand and bought raw aka green peanuts.

Um, I wasn't really interested in peanuts at the time... so enjoy some other fresh local produce:
Watermelon

This particular stand had several hand painted chalk boards for each item they sold.

Vine ripe GA tomatoes. Aren't they pretty? Pretty tasty :)
Mom and Dad went home and the peanuts went into the fridge. A few days later we remembered we were going to make boiled peanuts. It was late and they take a few hours. Gram decided to be in charge of turning the peanuts off and drain them when they were done.

I arrived early the next morning since we were going to Florida to meet up with my aunt, uncle, and cousins. I must have been tremendously hungry because I snatched a peanut up off the counter, cracked the shell and slurped out the nuts. (I'm told the proper way to eat them is indeed, to slurp the nut out of the shell) And you know what, I liked it. A lot. Mom even sent some home with me! Yummy. (So much for never ever trying them again LOL.)

Here are a few other highlights from the weekend:

A striped sea anemone my mom found on our beach walk. When we'd touch it, the anemone would ball up tightly to protect itself. It was beyond cool. Great fun find, Mom!

Me and my cousin Raquel. I'm so excited she's home from college for the summer!

Ok, I know it's sideways, blogger is being difficult- anywho,  I don't recall this particular Dick and Jane title!

I told Jon he couldn't make his angry face, my dad cracked up. I LOVE this picture of the two of them :) Click the picture to see the full sized version- it's super fun.
Best. Memorial Day weekend. ever.

Here's to you and your culinary adventures, friends. Cheers!

  Boiled Peanuts

  2 lbs raw green peanuts in the shell, washed well
·       ½ cup salt


        Add water three times the depth of peanuts in the pot
\

 Place washed peanuts(still in the shells) in a pot with water and salt. Weight down the peanuts with a heavy   plate  if desired. Boil 2-1/2 to 3 hours, stirring occasionally, adding water as necessary.


If peanuts are cooked through but not salty enough, remove pot from heat and let peanuts sit in the brine. Recheck for saltiness every 20 minutes.

Drain well.


Store in covered container in the refrigerator.

To eat- Reheat peanuts for a few seconds in the microwave. Crack and split the shells open. Slurp the nuts right out of the shell. 

* You can freeze cooked, boiled peanuts. Thaw and reheat in the microwave for a tasty treat.


Friday, April 22, 2011

Grilled Black Bean Quesadillas

I don't know if you've caught on to my dirty little secret- I have been slowly incorporating more and more meatless supper nights into my menu.

I say it's a secret because my sweet husband only recently caught on.

It started out as a break from meat (I lack the ability to properly break down/digest animal protein) once in a while. Then I realized it was helping my budget out too. So, a few months ago it turned into a once a week deal. And now, it's my favorite night of the week!

Tonight we had grilled black bean quesadillas. So good.

I made these two ways- first, I made the taco seasoned black beans. Then, I divided the beans up into two batches. To the second batch I added some leftover cooked, diced chicken.

We crisped up the tortillas on the grill for a hint of smokey flavor. Layered on the seasoned beans, a little cheddar cheese, lettuce, tomato, and a drizzle of thinned sour cream. Top it all off with a second crispy tortilla. And just like that supper was served.

A definite keeper for this house.

Here's to you and your culinary adventures, friends. Cheers!

Grilled Black Bean Quesadillas
Makes 4
Approx 340 calories per

1 can black beans, drained and rinsed well
1-2 TBS taco seasoning
8 taco sized flour tortillas
2 oz reduced fat finely shredded cheddar cheese
shredded lettuce
1 medium, seeded and diced tomato
2-3 TBS reduced fat sour cream

Combine beans, taco seasoning, and 1/2 cup water in a skillet. Simmer, uncovered 8-10 minutes until thickened.* Remove from heat. Slightly mash if desired.

On a preheated grill, toast both sides of each tortilla.

To assemble: Place one tortilla on a plate. Spoon over 1/4 of the seasoned beans. Top with 1/2 oz cheese, lettuce, and tomato.

Thin the sour cream out slightly by stirring in a little water or milk until the cream drizzles easily.

Drizzle the sour cream over the fillings. Top with a second tortilla. Cut into 6 wedges. Serve.

* You can add 1/2 cup of precooked, diced chicken at this point if you'd like.

Friday, April 15, 2011

Meatless Lasagna Rolls

These were, stellar.

Honestly, I ate these for 3 days. They just got better each day.


They have all the things I adore about lasagna-only made lighter and quicker.

I served homemade basil bread sticks as a side for this dish. They are a new creation of mine. This was a huge deal for me. I only recently have learned how to deal with yeast breads. I am starting to get more comfortable with them so I decided it was time to experiment.

My favorite part of making the dough is watching the yeast bloom. It's like a little science experiment every time! And the smell, it sends me over the moon every single time. Love it.

I took my basic pizza dough recipe (yeast, water, honey, salt, and flour) and doctored it up with a heaping tablespoon of very finely chopped basil.


Look how pretty the dough is with flecks of basil. It was so aromatic. Definitely a happy smell :)

Here's to you and your culinary adventures, friends. Cheers!

Meatless Lasagna Rolls
Serves 6
245 calories per


6 lasagna noodles*
1/4 cup egg beaters OR 1 egg beaten
1 cup part skim ricotta cheese
1 cup shredded part skim mozzarella cheese
2 TBS grated Parmesan cheese
5 oz frozen spinach, thawed and squeezed dry
1/8 tsp salt
1/8 tsp pepper
a tiny pinch of ground nutmeg
14 oz meatless spaghetti sauce

Preheat oven to 375.

Cook lasagna noodles until done- about 10 minutes. Drain and lay flat on a baking dish to cool.

Combine egg, cheeses, spinach, salt, pepper, and nutmeg together in a small bowl. Score into 6 even sections.

Spray a 9x9 baking dish with cooking spray. Spread about 1/3 of the sauce into the bottom of the dish. Set aside.

Working with one noodle at a time- scoop out one section of the scored cheese mixture and spread over 2/3 of the pasta, leaving empty space at one end of the noodle.

Starting at the filled end- roll up. Some of the filling will push down the length of the pasta as you roll, this is why you left a space at the end. Place seam side down in the baking dish. Repeat with remaining noodles and filling.

Cover with remaining sauce.

Bake, uncovered, for 20-25 minutes.Remove from oven. Let cool at least 10 minutes before serving.

* I used oven ready noodles because they have ridges in them. Just boil up as you normally would in salted water.


Basil Bread Sticks
96 calories per
Makes 12


2 tsp honey
1 package active dry yeast (about 2 1/4 teaspoons)
3/4 cup warm water (100° to 110°)
2 1/4 cups all-purpose flour (about 10 ounces), divided
1/2 tsp salt
1 heaping TBS of very finely chopped fresh basil
Cooking spray

Dissolve the honey and yeast in 3/4 cup warm water in a large bowl. Let stand 5 minutes or until bubbly. Add basil.

Lightly spoon flour into dry measuring cups; level with a knife. Add 2 cups flour and salt to yeast mixture; stir until dough just starts to come together. Turn dough out onto a lightly floured surface. Knead until smooth and elastic (about 6-8 minutes); add enough of the remaining flour, 1 tablespoon at a time, to prevent dough from sticking to hands (dough will feel slightly sticky).

Place dough in a large bowl coated with cooking spray, turning to coat top. Cover with a clean tea towel and let rise in a warm place, free from drafts, 30 minutes or until doubled in size. (Gently press two fingers into dough. If the indentation remains, the dough has risen enough.)

Punch dough down and divide into 12 balls (about 1 1/2 oz per). Roll into bread stick shapes. Lay onto a baking prepared baking sheet. Lightly spray surface of dough with cooking spray, and cover loosely with plastic wrap. Cover with a tea towel. Let rise 20 minutes.

In an oven preheated 375, bake for 8-10 minutes until golden. Brush with melted butter if desired.

Wednesday, April 6, 2011

Griddle Pizza

Jon and I enjoy pizza on occasion.

We very rarely eat fast food pizza.

When we eat pizza it's generally "good for you" pizza. Lots of veggies, sometimes fruit, light on the sauce, and homemade pizza dough.

I've made pizza on a pizza stone,on a sheet pan, on a perforated pizza pan, on a grill, and over a campfire. Tonight we tried a new technique- pizza on a counter top griddle.

Super easy. It doesn't heat up the house. And it makes a really crispy, sturdy crust. We really enjoyed it.


We've had this particular recipe before, but I've always made some adaptations. This is first time we've followed it step by step, ingredient for ingredient. The revisit was well worth the time and effort.

Here's to you and your culinary adventures, friends. Cheers!

Griddle Pizza
Serves 4
357 calories per pizza


1 package dry yeast (about 2 1/4 teaspoons)
2/3 cup warm water (100° to 110°)
3 1/2 teaspoons olive oil, divided
1 2/3 cups all-purpose flour
1 tsp sugar
1/2 tsp salt
1/2 tsp dried oregano
1/4 tsp dried thyme
Cooking spray
1/2 cup (2 ounces) shredded part-skim mozzarella cheese, divided
1/4 cup (1 ounce) grated fresh Parmesan cheese, divided
2 1/2 cups coarsely chopped trimmed arugula (about 4 ounces)
1 1/2 cups chopped seeded tomato
1/4 cup chopped fresh basil
2 tsp balsamic vinegar
1 1/2 tsp Dijon mustard
1 (14-ounce) can artichoke hearts, drained and chopped

Dissolve yeast in warm water in a large bowl; let stand for 5 minutes. Stir in 1 1/2 teaspoons oil. Lightly spoon flour into dry measuring cups; level with a knife. Combine flour, sugar, salt, oregano, and thyme. Add to yeast mixture; stir well. Turn dough out onto a lightly floured surface. Knead until smooth and elastic (about 10 minutes).

Place dough in a large bowl coated with cooking spray, turning to coat top. Cover and let rise in a warm place (85°), free from drafts, 45 minutes or until doubled in size. (Press two fingers into the dough. If indentation remains, the dough has risen enough.) Punch dough down; cover and let rest 5 minutes. Divide in quarters. Roll each portion into a medium sized circle on a floured surface.

Heat a griddle coated with cooking spray over medium heat. Place one dough portion on pan; cook 5-10 minutes until golden brown. Turn dough over; sprinkle with 1/8 cup mozzarella and 1 tablespoons Parmesan. Cook 5-10 minutes; remove from pan. Repeat procedure with remaining dough and cheeses. (My griddle is large enough to make 2 pizzas at once.)

Combine 2 teaspoons oil, arugula, and remaining ingredients in a medium bowl. Spoon 2cups salad onto each pizza crust using a slotted spoon. Cut each pizza into 4 wedges. Serve immediately.